Kosha Mangsho ( Meat )
- The Hungry Boy

- Apr 23, 2020
- 3 min read
Updated: May 16, 2020
Both my parents are exceptional cooks & have carved out their respective forte in the home cooking domain . As kids , we grew up seeing many menu plans - written out in multiple courses and executed to the T . No matter what the occasion or the number of guests , every meal was home cooked . The food menu was sort of a key note address and never outsourced. I was often subjected to the question of who was the better cook , which i more often , left unanswered :)
One can usually fine two styles of cooking in the home kitchen - One genre who follow non- negotiable rules - they stick to the portion size & follow every step of the process to the last syllable . The other genre - focus on fast turn around as the main denominator and tweak in innovations as they go along . While the 1st genre delivers the better result , the second , makes room for innovation and new creation .
Making Kosha Maangsho is all about the 1st style with non - negotiable rules & more importantly , the slow cooking process and the pre - marinade
Things you will need for the Pre -Marinade
01 kg of curry cut mutton
200 gms of yogurt
01 large onion paste
01 tbsp of garlic paste + 01 tbsp ginger paste
01 tsp turmeric powder
01 tsp salt
02 tbsp mustard oil
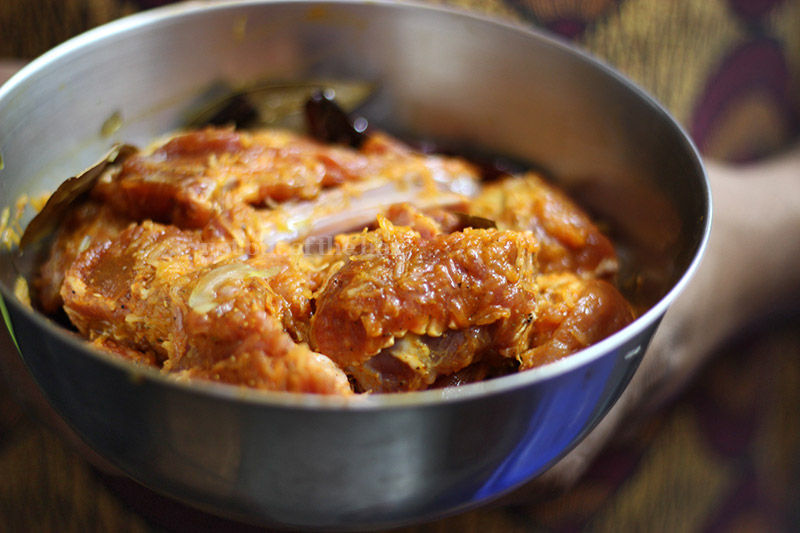
The key step to the get the meat softened up and basking in flavor is the pre - marinade . In a bowl , assemble all the meat pieces , pat them dry and keep aside . Mix all the pre-marinade ingredients ( mentioned above ) with a whisk in a separate bowl . Using your hand , rub the pre- marinade into all the nooks and crannies of the meat . Rest aside for 4-5 hours or refrigerate overnight for best results .
Things you will need for the gravy
03 large thinly sliced onions
03 tbsp ghee + 6 tbsp mustard oil
Whole Garam Masala
- 04 cloves of cardamom
- 02 cinnamon sticks
- 01 black cardamom
- 03 pcs dried red chilly
- 02 pcs bay leaves
02 tbsp Kashmir red chilli powder ( Only for color )
01 tbsp coriander powder
01 tbsp of turmeric powder
02 tbsp cumin powder
02 tbsp Garam masala powder
01 tsp sugar
02 tbsp of ginger- garlic - green chilli paste
Hot water
Steps 1. Heat a large kadai and add mustard oil + ghee - Once the oil starts to smoke lightly and has changed color to a pale yellow , add the dried red chilly , bay leaf and all the whole garam masala mentioned above . Saute for 01 minute. 2. Next , add the sliced onions and fry them on medium flame . Add the sugar and saute for about 10 minutes until they are light brown in color. At this point , add the ginger - garlic and green chilli paste and fry for another 5 minutes. Keep the flame on medium or low and stir often .
3. Next, add the dry spices i.e the coriander, cumin, kashmiri red chilli & turmeric powder
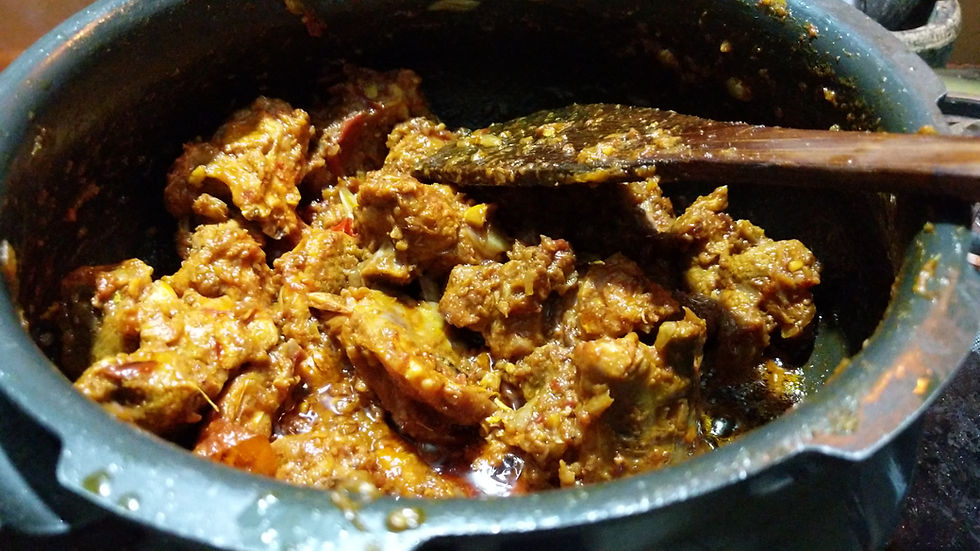
4. Continue frying the onions along with the spices for about 10- 15 more minutes 5 . Once you see the oil has released from the spices and onion mix - add the pre -marinated mutton to the kadai . 6. Raise the heat and mix everything thoroughly - fry the meat , stirring frequently to check that it is not sticking to the kadai for the next 10 minutes . Ensure you are monitoring the entire step as we dont want the meat or masala to burn .
7 . After the 1st 10 mins , move the heat to low heat and continue to fry for the next 90 -120 minutes . As you go along , add a splash of hot water , every time to the pan ( 30 ml at a time) to prevent anything from sticking . 8 . Once you are happy with the color , add as much water as you’d like for the gravy - Cover and cook until the mutton is tender and can be separated by the finger .
9 . Once done , top with ghee and garam masala before serving .
Pro- tip - The slow cooking process needs to yield a dark brown color and not turn black due to over caramalisation or burning . Cooking on high heat will burn the spices and will also make the meat terse. Cook it slow and with all the time & care , for best results :)


Comments